Bill of materials and progress tracking
This tool closely resembles a normal bill of materials, but it allows you to track the manufacturing progress of individual parts. You gain improved information flow and better visibility of the overall project.
There’s no automation with automatic feedback, so this needs be done by the responsible employee.
As described in the guideline for Manufacturing planning and utilization overview, this approach helps you get started with a digital project overview.
It’s also important to note that this is an evolving approach that doesn’t include service: Its application is at the user's own risk.
The guideline is used for initial configuration.
The corresponding formatting needs to be checked or adjusted for any customer modifications.
A. General explanation for using the bill of materials
Simultaneous access by multiple users can be allowed in Excel. This can be helpful to ensuring smooth processing.
More detailed information: https://support.microsoft.com/en-us/office/collaborate-on-excel-workbooks-at-the-same-time-with-co-authoring-7152aa8b-b791-414c-a3bb-3024e46fb104?ui=de-de&rs=de-de&ad=de
All cells containing an action have an "explanatory note." This is indicated by a red triangle in the upper-right of the cell.
The users also need to be instructed, because the bill of materials doesn’t include automatic self-checking.
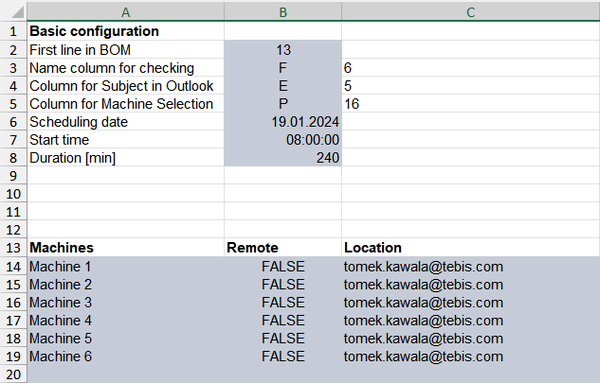
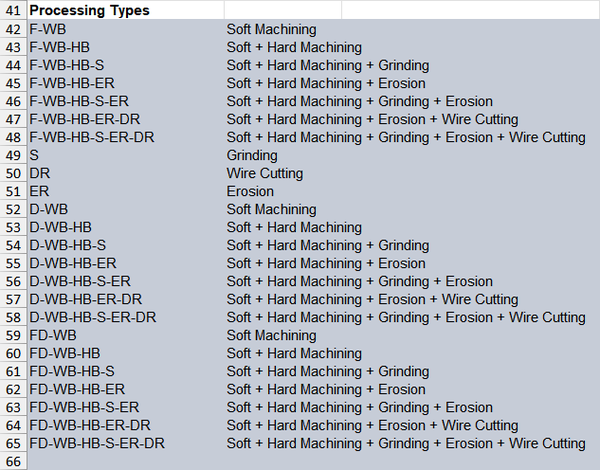
B. Explanation of individual columns and drop-down menus in the Config worksheet
1.
2.

3.

4.

C. Explanation of handling the bill of materials in daily work
1.
Column D "Type" describes the part with regard to semi-finished products (purchased parts, inventory parts, manufactured parts or purchased parts with reworking).
In column M "Spare/wear," the user indicates whether this is a spare or wear part.
Column N "Delivery deadline" is generally filled out by work preparation employees.

2.
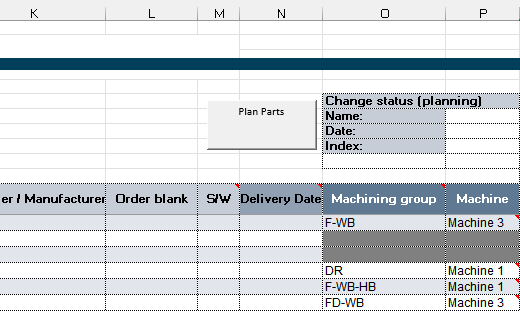
Cells with a dark-gray background indicate that this work step isn’t necessary for manufacturing the part.
This is determined by the selection in column D "Type" and column O "Machining group."
If type "Purchased part" or "Inventory part" is selected in column D, all fields in columns O to AB are grayed-out in the corresponding row, and no machining is necessary.
Machining is necessary for all other part types. The relevant cells will have a white or gray background, depending on the machining group selected.
The machine that will manufacture the part can be selected in column P "Machine." If the part has to be manufactured on multiple machines, we recommend that you look at the tool "Detailed machine planning with Microsoft Outlook."

3.
Each employee now has the task of specifying their status in %. To minimize the required effort, it’s possible to only define two machining status levels. For example, 1% for "work step started" and 100% for "work step completed."
The employee responsible for the last work step releases the part for assembly in column AC "Ready for assembly." The status then changes to green.

D. Linking the manufacturing planning and utilization overview
The Plan Part(s) button is only used for detailed machine planning. More information on this is provided in the "Manufacturing planning and utilization overview"

Download "Bill of materials and progress tracking" tool
Please fill out the form to download the Excel "Bill of materials" file.
